When it comes to the total Sprinter van conversion cost, you’re looking at a huge spectrum. On one end, a lean, do-it-yourself project can come in around $15,000. On the other, a high-end, professional build can easily climb to $150,000 or more. And that's all before you even factor in the price of the van itself.
This massive price gap really boils down to three things: the materials you choose, how complex your systems are, and the biggest decision of all—whether you build it yourself or hire a professional.
Decoding Your Sprinter Van Conversion Budget
Before you even think about buying a single 2×4 or watching your first YouTube tutorial, it’s crucial to get a firm grasp on the financial side of a van build. I always tell people to think of their total budget as being built on three main pillars. The size and strength of each pillar will directly shape the final cost and what your van can do.
Getting this part right from the start is the key to a project that's exciting, not stressful.
The three foundational pillars of your Sprinter van conversion cost are:
- The Base Vehicle: This is almost always your single biggest upfront investment. The van's age, mileage, and condition can easily eat up more than half of your entire budget.
- Labor (DIY vs. Professional): This is the ultimate fork in the road. Choosing to invest your own sweat equity versus paying for an expert’s craftsmanship will have the most dramatic impact on your bottom line.
- Systems and Materials: This is where you decide your on-the-road comfort level. The quality of your electrical setup, plumbing, and interior finishes will dictate both your daily experience and a massive chunk of the build-out expense.
The Van Price Is The Starting Line
One of the first things to wrap your head around is the cost of the Sprinter van itself. A brand-new Mercedes-Benz Sprinter will set you back anywhere from $50,000 to $78,000. If you go the used route, you’re more likely looking at a range between $20,000 and $40,000, depending heavily on its condition.
This vehicle price alone is a huge part of the equation, often making up more than half the total investment before you’ve even bought a single screw. You can learn more about what influences the price of a Sprinter van to get a better feel for the market.
Understanding these budget tiers is your first step. It helps anchor your dreams in financial reality, allowing you to prioritize what matters most—whether that’s off-grid capability, interior comfort, or simply hitting the road as affordably as possible.
To give you a clearer picture of what your money gets you, let's break down the common budget levels for the conversion itself. The table below gives you a quick snapshot of what to expect at each tier, excluding the price of the van.
Sprinter Van Conversion Cost At A Glance (Excluding Van)
This table provides a quick summary of estimated conversion costs across three common budget tiers, outlining the typical features and trade-offs for each level.
| Budget Tier | Estimated Cost Range | Typical Features | Best For |
|---|---|---|---|
| Low-Budget | $15,000 – $35,000 | Basic insulation, simple bed platform, portable power station, camp stove, basic water jugs. | Weekend warriors and those prioritizing affordability and simplicity in their DIY build. |
| Mid-Tier | $35,000 – $75,000 | Quality insulation, robust solar/electrical system, fixed bed, running water with sink, diesel heater. | Long-term travelers seeking a balance of comfort and functionality, often a high-quality DIY or basic professional build. |
| High-End | $75,000 – $150,000+ | Premium materials, advanced lithium electrical systems, indoor shower/toilet, A/C, custom cabinetry. | Full-time van lifers and those wanting a luxury, professionally built home on wheels with all amenities. |
As you can see, there's a fit for almost every ambition and wallet. Use this as a guide to figure out where your vision aligns and start planning your build from a realistic, informed place.
Choosing Your Foundation: The Van Itself
Long before you even think about insulation or cutting into a single panel, you'll make the single biggest financial decision of your entire project: buying the van. This isn't just a vehicle; it's the foundation for your future home on wheels, and its price tag sets the tone for your entire budget. It's easy to boil this down to a simple "new versus used" question, but that's a massive oversimplification. The reality is a complex market where a dozen different factors can dramatically swing your starting Sprinter van conversion cost.
The price for the base van can easily vary by tens of thousands of dollars. A brand-new Sprinter is a blank slate with a factory warranty, but that peace of mind comes with a premium price, often starting around $50,000 and climbing from there. On the flip side, the used market can offer incredible value, with solid vans available anywhere from $20,000 to $40,000. The catch? You've got to be a much savvier shopper.
Navigating The Used Sprinter Market
When you're hunting for a used van, it all comes down to three things: mileage, model year, and overall condition. A newer, low-mileage Sprinter will obviously cost more, but it might save you from a world of mechanical headaches later on. Older, high-mileage vans look tempting with their lower sticker prices, but they come with a higher risk of major wear and tear on the engine, transmission, and other expensive parts.
I like to think of it like buying a house. You could have two homes with the exact same square footage, but one is a modern build and the other is a 100-year-old fixer-upper. Their prices will be wildly different because they reflect the amount of work and financial risk you’re taking on. If you're eyeing an older van, you absolutely must budget for a potential repair fund.
Getting a pre-purchase inspection from a certified diesel mechanic isn't just a good idea—it's non-negotiable. Spending a few hundred dollars now can easily save you from a multi-thousand-dollar mistake. It's one of the smartest investments you'll make in the entire process.
Decoding Factory Specifications
Beyond the new-versus-used debate, the van’s original factory specs have a huge impact on both the initial cost and what you can do with the build. These are the built-in features that define the very space you have to work with and the kinds of adventures you can chase.
You’ll be making three main choices here:
- Wheelbase Length (144” vs. 170”): The shorter 144" wheelbase is nimble, a breeze to park in cities, and great for stealth camping. The longer 170" wheelbase, however, gives you a massive amount of interior real estate, opening the door for layouts with fixed beds, full showers, and more living space—it's just a bit trickier to maneuver.
- Roof Height (High vs. Low): For a camper conversion, a high roof is practically a must-have. It lets most people stand up completely straight inside, which is the difference between a cramped cargo space and a comfortable home. A low roof is cheaper, but it kills the comfort factor and severely limits your layout options.
- Drivetrain (2WD vs. 4×4): A standard two-wheel-drive (2WD) van is more affordable, gets better gas mileage, and is perfectly fine for most roads and campgrounds. The four-wheel-drive (4×4) option is your ticket to the backcountry, unlocking remote trails and rugged campsites, but it comes with a higher price tag, more maintenance, and worse fuel economy.
Each of these choices is a classic trade-off between cost, comfort, and capability. A 170" 4×4 high roof Sprinter is the top of the line—and has a price to match—but it also gives you the ultimate platform for a spacious, go-anywhere rig. Figuring out how these specs align with your budget and travel dreams is the first real step to building the perfect van.
DIY vs. Professional: The Biggest Budget Decision

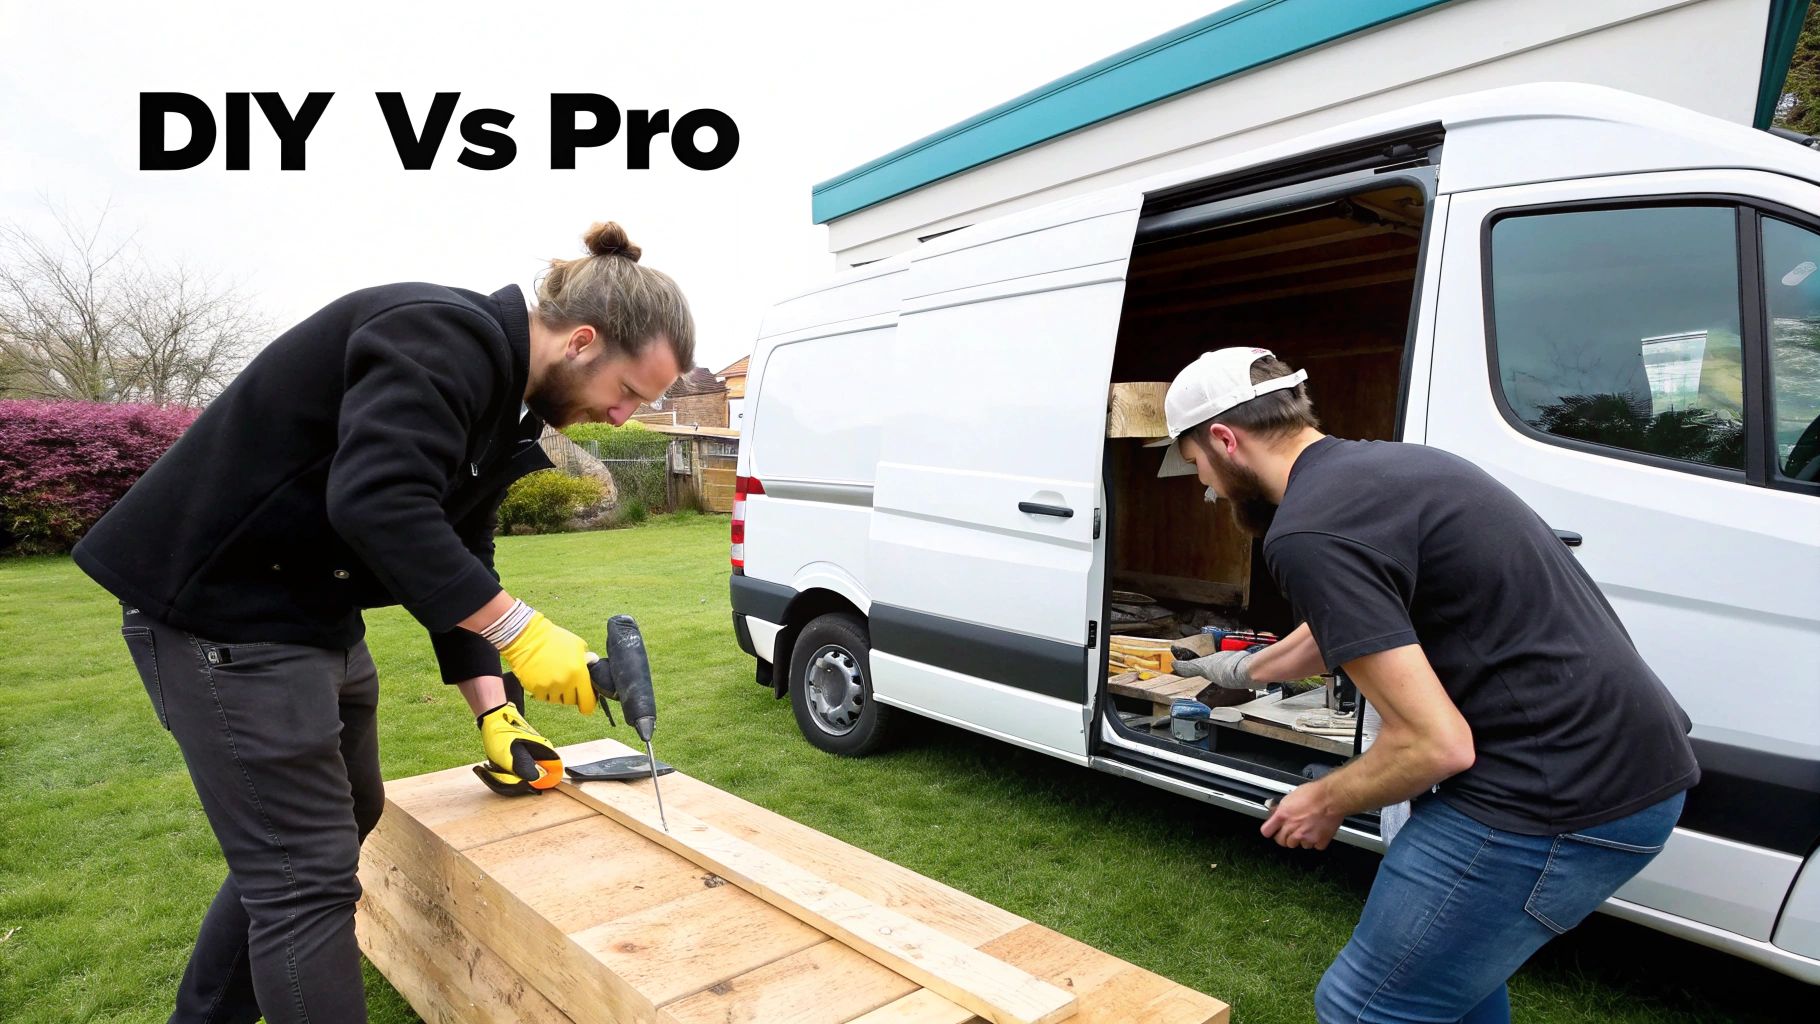
Once you've got the keys to your Sprinter, you’ll face the single biggest decision that will shape your entire project: are you going to build it yourself, or hire a professional? This is the ultimate fork in the road. Your choice here will send your budget, timeline, and the very nature of the build in completely different directions. It’s the classic battle of time versus money, but the truth is, it runs a lot deeper than that.
The do-it-yourself (DIY) route is incredibly alluring, promising massive savings right out of the gate. Considering professional labor can eat up 40-60% of a total build cost, the appeal of investing your own sweat equity is obvious. Going DIY also gives you total creative freedom to build a layout that’s perfectly, uniquely yours.
But that freedom comes with a steep price. The learning curve for a van build is a beast, covering everything from carpentry and metalwork to the intimidating complexities of 12V electrical systems. A full conversion is a monumental time commitment, often taking anywhere from 800 to 2,000 hours. For someone chipping away at it on nights and weekends, that can easily turn into a year-long endeavor.
The True Cost of a DIY Conversion
The price tag on your materials is just the beginning. A handful of "hidden" costs can sneak up on you and inflate your budget, so it’s critical to factor them into your sprinter van conversion cost from the start.
- Specialized Tools: Unless you’re already a seasoned builder with a stocked workshop, you’ll probably need to buy or rent some heavy-duty tools. We're talking about miter saws, jigsaws, impact drivers, and specialized wiring crimpers. These can easily add another $1,000 – $3,000 to your bottom line.
- Mistakes and Wasted Materials: You will make mistakes. It’s inevitable. That mis-cut sheet of expensive Baltic birch plywood or a wiring goof that fries a component means buying things twice. Setting aside a contingency fund of 10-15% isn’t just smart—it’s essential for covering these learning moments.
- The Time Investment: Your time has value. The hundreds of hours you’ll pour into research, planning, and building could have been spent elsewhere. This "opportunity cost" is a real, though non-monetary, expense you have to consider.
The DIY path is less about saving money and more about reallocating it. Instead of paying for labor, you're paying in time, research, tool acquisition, and the occasional costly mistake. It's an incredibly rewarding journey, but one that demands patience and a realistic budget.
The Professional Build Advantage
Hiring a professional conversion company, whether it's a well-known name like Outside Van or a smaller local outfit, is the other end of the spectrum. Yes, the upfront cost is significantly higher, but what you're really paying for is expertise, efficiency, and peace of mind. A full professional build can be completed in just 8 to 16 weeks—a tiny fraction of the time most DIY projects take.
These builders bring years of experience to the table, ensuring that tricky systems like electrical and plumbing are installed safely and correctly. They know the standards and build to them. This level of craftsmanship not only gives you reliability on the road but can also seriously boost your van's resale value. A well-documented professional build is simply a safer bet for future buyers.
The main hurdle, of course, is the price. Labor costs for a custom build can run anywhere from $25,000 to over $75,000, all depending on complexity. But that cost buys you a streamlined process, access to high-quality materials (often at trade prices), and a finished product that’s durable and dependable from day one.
Finding Middle Ground: The Hybrid Approach
For many people, the smartest solution lies somewhere in between. A hybrid approach is a fantastic strategy for balancing cost, quality, and your own sanity. It’s all about tackling the jobs you're comfortable with and outsourcing the technical, high-stakes stuff.
For instance, you might handle the gutting, insulation, flooring, and basic woodworking for your bed and cabinets. Then, you could bring in a professional for the electrical system, window installation, and diesel heater—the jobs where a mistake can be dangerous or incredibly expensive to fix. This lets you save a bundle on labor for the more straightforward tasks while ensuring your rig's critical systems are rock-solid, safe, and built to last.
An Itemized Breakdown Of Build Costs
Alright, we’ve talked about broad budget tiers, but now it's time to get our hands dirty. To really understand the sprinter van conversion cost, we have to break a build down into its individual parts. This is where abstract spreadsheet numbers turn into real-world components you can actually see and touch.
By itemizing the major systems, you get a crystal-clear picture of where your money is going. You'll see how choosing one type of battery over another or adding a shower can create a ripple effect across your entire budget.
Laying The Foundation
Let’s start with the unsung heroes of any comfortable build. These aren’t the flashy, Instagram-worthy parts, but they form the essential shell of your future home on wheels. Trust me, skimping here is a mistake you’ll regret on the first cold night or noisy highway.
- Insulation and Sound Deadening: Expect to spend anywhere from $800 to $2,000. Quality insulation like 3M Thinsulate and sound deadening mats are non-negotiable for regulating temperature and keeping road noise out. A quiet, comfortable cabin starts here.
- Framing, Subfloor, and Walls: This can run from $1,000 to $3,500. The cost depends heavily on your choice of materials—from basic plywood to beautiful, custom-milled wall panels. This is the skeleton that holds everything else up.
The Heavy Hitters: Core Systems
Now we get to the big three systems that truly define a modern campervan’s function and comfort: electrical, plumbing, and climate control. These are, without a doubt, the most significant chunk of your conversion budget after the van itself.
Your choices in these areas directly impact your ability to live off-grid and your overall quality of life on the road. For a deeper dive into how these costs accumulate in a full van build, it's worth seeing how the numbers stack up in a real-world example. It's not uncommon for a professional solar and electrical install to hit $18,000, with heating and AC adding another $7,700. These are the investment pieces.
Think of these systems as the vital organs of your van. The electrical system is the heart, pumping power everywhere. The plumbing is the circulatory system, and climate control is the respiratory system, letting the van breathe. Investing in their quality is investing in the long-term health and reliability of your entire mobile home.
To get a clearer picture, let's look at the estimated costs for the individual components that make up a mid-to-high-end build.
Itemized Cost Breakdown For A Mid To High-End Conversion
The table below breaks down the typical cost ranges for the major systems in a professional or a high-spec DIY conversion. Notice how material choices and system complexity can drastically change the final price for each category.
| System/Component | Low-End Cost Estimate | High-End Cost Estimate | Key Cost Factors |
|---|---|---|---|
| Electrical & Solar | $5,000 | $20,000+ | Battery chemistry (AGM vs. Lithium), battery bank size (Ah), solar wattage, inverter quality. |
| Plumbing & Water | $1,500 | $5,000 | Tank sizes, inclusion of a hot water heater, indoor vs. outdoor shower, filtration systems. |
| Climate Control | $1,600 | $9,900+ | Diesel heater vs. propane, number of vent fans, addition of a power-hungry AC unit. |
| Insulation & Sound | $800 | $2,000 | Material quality (Thinsulate, Havelock Wool), extent of sound deadening coverage. |
| Interior Build-Out | $5,000 | $25,000 | Material choices (plywood vs. custom cabinetry), complexity of design, appliances. |
| Exterior Add-Ons | $2,000 | $15,000 | Roof rack, ladder, windows, awning, suspension upgrades, tires. |
As you can see, the variability is huge. A simple, functional build can be done toward the lower end of these ranges, while a feature-packed, four-season adventure rig will quickly climb toward the high end.
Powering Your Adventures: The Electrical System
Your electrical setup is arguably the most complex and critical part of your build, with costs flying from $5,000 to over $20,000. The price is almost entirely driven by your battery chemistry (like AGM vs. Lithium), the total capacity you need, and how you plan to charge it all up.
- Batteries: Lithium batteries are the gold standard. They last longer and you can use more of their stored power, but they come with a premium price tag. A solid 400Ah lithium setup can easily cost $4,000 or more for the batteries alone. A similar AGM system might be half that, but it comes with major trade-offs in weight and performance.
- Solar Power: Panels, a charge controller, and the mounting hardware will typically add $1,000 to $3,000. The more solar wattage you can fit on your roof, the longer you can stay parked in one beautiful, remote spot.
- Inverter & Components: You’ll need a quality pure-sine inverter ($500 – $1,500) to run standard household appliances. All the fuses, heavy-gauge wiring, battery monitors, and switches will tack on at least another $1,000 to the final bill.
Plumbing And Climate Control Essentials
A functional plumbing system—giving you running water for dishes, cooking, and washing up—is going to cost between $1,500 and $5,000. This covers your fresh and grey water tanks, a water pump, a sink, and all the tubing to connect it. If you want to add a hot water heater and an indoor shower, you’ll quickly find yourself at the higher end of that range.
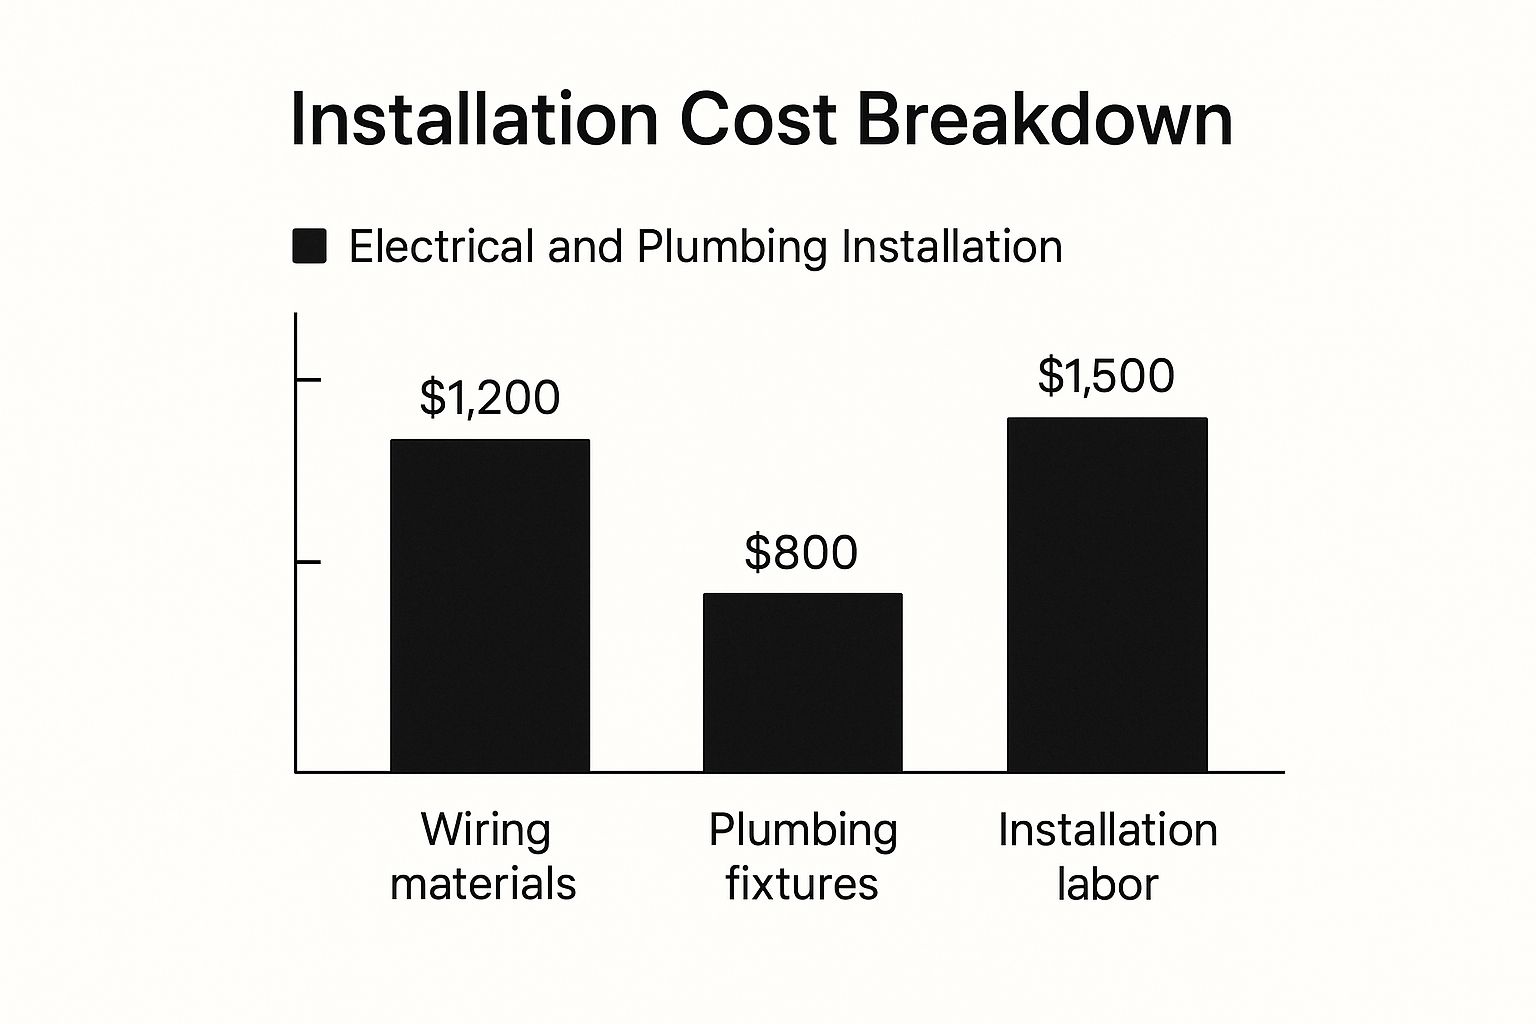
As this breakdown shows, the specialized labor for these systems can often cost just as much as the parts themselves. It's a crucial factor to consider when deciding between DIY and a professional builder.
Finally, climate control is what turns a van into a true four-season home.
- Heating: A diesel heater is the go-to for most builders. It’s incredibly efficient and sips fuel straight from your van's main tank. A complete, professional installation will run you $1,200 to $3,000.
- Ventilation: A high-quality roof vent fan is absolutely non-negotiable. It pulls out cooking smells, moisture, and hot air. Budget $400 to $900 for each installed fan, and most people recommend two for good airflow.
- Air Conditioning: An AC unit is a true luxury, but for some, it's a must-have. A rooftop unit is a serious power hog and can cost $3,500 to $6,000 installed—and that’s before you factor in the massive battery bank needed to run it.
Smart Strategies to Lower Your Conversion Cost
Seeing those six-figure price tags can be a real gut punch. But don't get discouraged—a high-quality, adventure-ready van is absolutely possible without draining your life savings. The secret is to be strategic, patient, and clever about where your money goes.
Lowering your sprinter van conversion cost isn't about cutting corners on safety. It’s about making smart trade-offs that align with what you really need. This means putting your dollars toward the critical systems that keep you safe and comfortable, then finding creative ways to save on the cosmetic stuff and non-essential gadgets. A little resourcefulness can save you thousands without compromising the heart of your build.
Embrace the Secondhand Market
One of the best ways to slash your expenses is to hunt for used or reclaimed materials. Think of it as a treasure hunt where the prize is a much smaller final bill. Online marketplaces and local reclamation yards are absolute gold mines for van builders on a budget.
You can find high-quality gear for a fraction of the retail price. It's not uncommon for people to start a project, change their minds, and offload perfectly good components at a steep discount.
Here are a few things to keep an eye out for:
- Lumber and Cabinetry: Cabinet makers, construction sites, and salvage yards often have off-cuts of high-grade plywood or beautiful reclaimed wood that are perfect for van interiors.
- Windows: You'll frequently find RV and van windows on marketplaces from people whose build plans changed. A used window can easily save you hundreds.
- Sinks and Faucets: Small bar sinks or used RV components are easy to find and work just as well as brand-new ones.
Your van build doesn't need to be 100% brand new. Prioritize new parts for critical systems like electrical wiring and fuses, but embrace pre-loved materials for structural and aesthetic elements to make your budget go further.
Master the Art of Simplification
Complexity is the enemy of a budget build. Every intricate curve, custom-angled cabinet, and multi-functional moving part adds a ton of time and expense. By simplifying your layout, you can bring down both material and labor costs in a big way.
Often, a simple, functional design is more durable and easier to live with in the long run anyway. Instead of spending a fortune on custom cabinetry, consider using high-quality pre-made cabinet boxes from a place like IKEA and just customizing the fronts. This approach can save you from a major woodworking headache and a huge slice of your budget.
Build Your Van in Phases
You don't have to build your dream van all at once. Phased building is a fantastic strategy that gets you on the road faster and spreads the cost out over time. Start by installing the absolute essentials, and then add the "nice-to-have" features later as you can afford them.
This approach lets you start enjoying your van right away and gives you real-world experience to inform your future upgrades. After a season on the road, you might discover you don't actually need that indoor shower after all.
A typical phased build might look something like this:
- Phase One (The Essentials): Get the foundation in place—insulation, subfloor, walls, a basic bed platform, and a portable power station and water jugs. This makes the van camp-ready from day one.
- Phase Two (Core Systems): Once you've saved up a bit more, invest in the permanent electrical system with solar and a good battery bank. Add a permanent sink with a water pump.
- Phase Three (Comfort and Luxury): The final phase can include the big-ticket upgrades like a diesel heater for winter trips, custom cabinetry for better storage, or an awning for your outdoor living space.
This methodical approach makes the total sprinter van conversion cost feel much less intimidating. It turns one massive financial mountain into a series of smaller, more manageable hills.
Common Questions About Van Conversion Costs
As you get closer to pulling the trigger on your build, a few final questions always seem to surface. It's totally normal. A project this big has a lot of moving parts, and getting these last few details ironed out is what gives you the confidence to dive in.
Think of this section as the final piece of the financial puzzle. We’ll tackle the most common questions we hear about Sprinter van conversion costs, giving you straight, practical answers. We'll cover timelines, resale value, and those pesky hidden costs that can sneak up on anyone.
How Long Does A Sprinter Van Conversion Take?
This is one of those "how long is a piece of string?" questions. The timeline for a van conversion can swing wildly, and it really comes down to one thing: who's doing the work.
If you're going the DIY route, get ready for a serious commitment. This is a true labor of love that demands a ton of patience. Most people estimate a full build takes somewhere between 800 to 2,000 hours of labor. If you’re a weekend warrior chipping away at it after work, you could easily be looking at six months to a year—or even longer. Even if you quit your job to work on it full-time, expect to be at it for three to five months.
Professional conversion shops, on the other hand, are a different ballgame. They have the experienced teams, the specialized tools, and the streamlined processes to get things done efficiently.
A professional shop can typically finish a full, custom Sprinter van conversion in just 8 to 16 weeks. That speed is a huge part of what you're paying for—it means you're out on the road making memories that much faster.
Does A Van Conversion Add Resale Value?
This is a huge question, and the answer is a firm "it depends." The single biggest factor that determines whether your conversion adds value is the quality of the build.
A top-notch, professional conversion from a well-known builder can absolutely add significant value. In some cases, these vans sell for more than the original cost of the van and the build combined. Why? Because buyers are paying a premium for peace of mind—they know they're getting proven craftsmanship, safe electrical and plumbing systems, and a layout that works. Detailed documentation, like wiring diagrams and manuals for all the components, makes it an even easier sell.
On the flip side, a sloppy or overly quirky DIY build can be a real liability. Potential buyers get spooked by questionable wiring, the possibility of hidden leaks, or a weird layout they'll just have to rip out. In those situations, your conversion might add very little value, and you might have an easier time selling an empty cargo van.
To get the best return on your investment, focus on:
- Professional-Grade Craftsmanship: Your work needs to be clean, safe, and built to last.
- A Timeless, Functional Design: Avoid hyper-specific layouts that only work for you.
- Quality Components: Don't skimp on the important stuff. Use trusted brands for your electrical and plumbing systems.
What Are The Biggest Unexpected Costs In A Van Build?
No matter how detailed your spreadsheet is, I can promise you this: there will be unexpected costs. It’s just part of the process. Knowing where these budget surprises usually pop up is the best way to prepare for them.
The first budget-killer is the death-by-a-thousand-cuts from "small" items. Every trip to the hardware store for screws, glue, sealant, wire connectors, and random fasteners seems small at the time. But trust me, over the course of a build, this stuff adds up to hundreds, if not thousands, of dollars you probably didn't account for.
Next, especially for DIYers, is the cost of tools. You might start the project thinking you have everything you need, but then you realize you need a better jigsaw for curved cuts, a miter saw for clean cabinet angles, or specific crimpers for your electrical system. These tool runs can blow a hole in your budget pretty quickly.
Finally, mistakes happen. It's inevitable. You will mis-cut that expensive piece of birch plywood. You will order the wrong size fan. These little errors often mean buying materials twice, a cost very few people bake into their initial plan.
This is why the most important line item in your entire budget is a contingency fund. Seasoned builders will tell you to set aside an extra 10-15% of your total project cost just to cover these surprises. Think of it as a safety net that keeps the project from stalling out when something goes wrong.
Planning a major event or need reliable corporate travel in the Chicago area? Max's Luxury Rides Inc. provides exceptional black car and limousine services, ensuring you arrive in style and comfort. Explore our fleet and book your next journey.